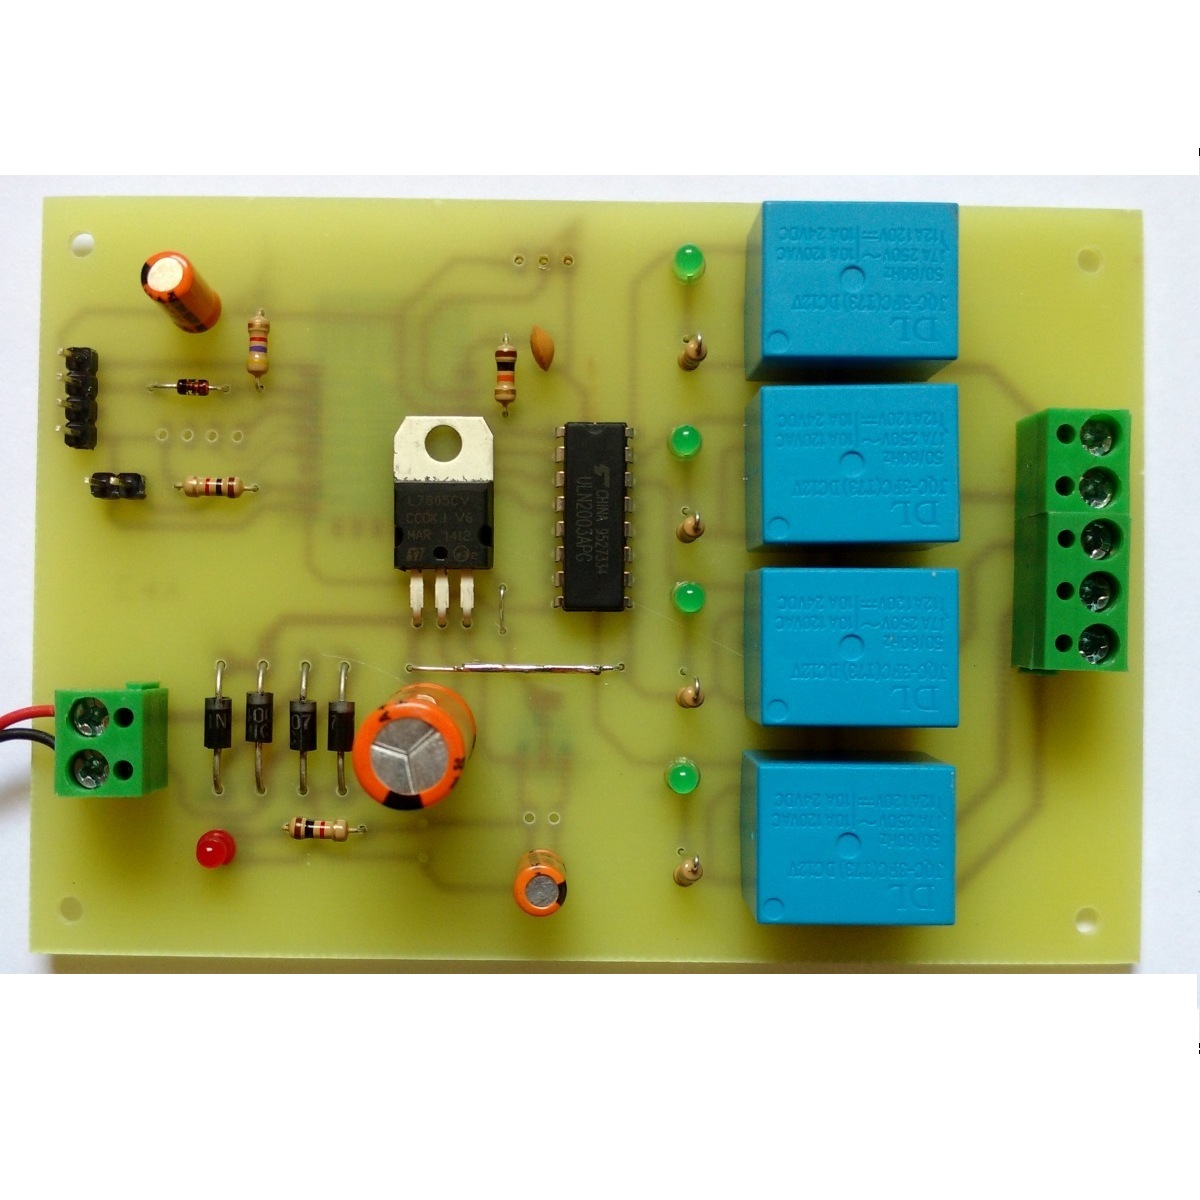
Description
IoT (Internet of Things) Based Home automation. In this project we can control home appliances using WiFi and Web based devices such as mobile, laptop, etc without installing any additional software. This system not only controls the electrical appliances but it also gives current status of home appliance on mobile phone.
This project is consists of four parts
- Power Supply
- IoT Device ESP8266
- Relay Driver
- Relays which operate AC Electrical home appliances
What You Need to Buy Additional to make this work ?
- 12V 1Amp DC Power Supply
- You have to connect AC Electrical Equipments
- Enclosure box for Electrical Safty
- Wiring of Electrical appliances with this circuits.
Block Diagram
Circuit Diagram
Component List
- ESP8266 (ESP12) Qty. 1
- 12V Sugar Cube Relays Qty.4
- ULN2003 Qty. 1
- LM7805 TO220 Qty. 1
- LM1117-3.3 SOT Qty. 1
- 1N4007 Diodes Qty. 4
- 1N4148 Diode Qty. 1
- Red LED 3mm Qty. 1
- Green LED 3mm Qty. 4
- 47uF/25V Capacitors Qty. 2
- 1000uF/25V Capacitor Qty. 1
- 0.1uF Capacitor Qty. 1
- 1K Ohm Resistor Qty. 2
- 10K Ohm Resistor Qty. 1
- 4.7K Ohm Resistor Qty. 5
- PBT2 Connector Qty. 2
- PBT3 Connector Qty. 1
- Buge Strip Connector Qty. 1
- 12V 1Amp Power Supply Qty. 1 (Not Included in order)
PCB Layout
Component Side Layout
ESP8266 Program for IoT Based Home Automation
1 2 3 4 5 6 7 8 9 10 11 12 13 14 15 16 17 18 19 20 21 22 23 24 25 26 27 28 29 30 31 32 33 34 35 36 37 38 39 40 41 42 43 44 45 46 47 48 49 50 51 52 53 54 55 56 57 58 59 60 61 62 63 64 65 66 67 68 69 70 71 72 73 74 75 76 77 78 79 80 81 82 83 84 85 86 87 88 89 90 91 92 93 94 95 96 97 98 99 100 101 102 103 104 105 106 107 108 109 110 111 112 113 114 115 116 117 118 119 120 121 122 123 124 |
/* * Copyright (c) 2015, circuits4you.com * All rights reserved. /* Create a WiFi access point and provide a web server on it. */ #include <ESP8266WiFi.h> #include <WiFiClient.h> #include <ESP8266WebServer.h> #include "index.h" const int Load1=16; const int Load2=14; const int Load3=12; const int Load4=13; /* Set these to your desired credentials. */ const char *ssid = "HomeServer"; const char *password = "homeautomation"; ESP8266WebServer server(80); String L1Status,L2Status,L3Status,L4Status,Temperature; //======================================================================= // handles main page 192.168.4.1 //======================================================================= /* Just a little test message. Go to http://192.168.4.1 in a web browser * connected to this access point to see it. */ void handleRoot() { String s = MAIN_page; s.replace("@@L1@@", L1Status); s.replace("@@L2@@", L2Status); s.replace("@@L3@@", L3Status); s.replace("@@L4@@", L4Status); server.send(200, "text/html", s); } //======================================================================= // Handle Set Date/Time Settings //======================================================================= void handleForm() { String t_state = server.arg("submit"); //Change Load-1 State as per request if(t_state=="ON1") { L1Status="ON"; digitalWrite(Load1, HIGH); //Load1 Turned on } if(t_state=="OFF1") { L1Status="OFF"; digitalWrite(Load1, LOW); //Load1 Turned off } //Change Load-2 State as per request if(t_state=="ON2") { L2Status="ON"; digitalWrite(Load2, HIGH); //Load1 Turned on } if(t_state=="OFF2") { L2Status="OFF"; digitalWrite(Load2, LOW); //Load1 Turned off } //Change Load-3 State as per request if(t_state=="ON3") { L3Status="ON"; digitalWrite(Load3, HIGH); //Load1 Turned on } if(t_state=="OFF3") { L3Status="OFF"; digitalWrite(Load3, LOW); //Load1 Turned off } //Change Load-4 State as per request if(t_state=="ON4") { L4Status="ON"; digitalWrite(Load4, HIGH); //Load1 Turned on } if(t_state=="OFF4") { L4Status="OFF"; digitalWrite(Load4, LOW); //Load1 Turned off } server.sendHeader("Location", "/"); server.send(302, "text/plain", "Updated-- Press Back Button"); //This Line Keeps It on Same Page delay(500); } //======================================================================= // Power on setup //======================================================================= void setup() { delay(1000); /* You can remove the password parameter if you want the AP to be open. */ WiFi.softAP(ssid, password); IPAddress myIP = WiFi.softAPIP(); server.on("/", handleRoot); server.on("/form", handleForm); server.begin(); pinMode(Load1, OUTPUT); pinMode(Load2, OUTPUT); pinMode(Load3, OUTPUT); pinMode(Load4, OUTPUT); } //======================================================================= // Main Program Loop //======================================================================= void loop() { server.handleClient(); } //======================================================================= |
index.h File
1 2 3 4 5 6 7 8 9 10 11 12 13 14 15 16 17 18 19 20 21 22 23 24 25 26 27 28 29 30 31 32 33 34 35 36 37 38 39 40 41 42 43 44 45 46 47 48 49 50 51 52 53 54 55 56 57 58 59 60 61 62 63 64 65 66 67 68 69 70 71 72 73 74 75 76 77 78 79 80 81 82 83 84 85 86 87 88 89 90 91 92 93 94 95 96 97 98 99 100 101 102 103 104 105 106 107 108 109 110 111 112 113 114 115 116 117 118 119 120 121 122 123 124 |
/* * Copyright (c) 2015, circuits4you.com * All rights reserved. /* Create a WiFi access point and provide a web server on it. */ #include <ESP8266WiFi.h> #include <WiFiClient.h> #include <ESP8266WebServer.h> #include "index.h" const int Load1=16; const int Load2=14; const int Load3=12; const int Load4=13; /* Set these to your desired credentials. */ const char *ssid = "HomeServer"; const char *password = "homeautomation"; ESP8266WebServer server(80); String L1Status,L2Status,L3Status,L4Status,Temperature; //======================================================================= // handles main page 192.168.4.1 //======================================================================= /* Just a little test message. Go to http://192.168.4.1 in a web browser * connected to this access point to see it. */ void handleRoot() { String s = MAIN_page; s.replace("@@L1@@", L1Status); s.replace("@@L2@@", L2Status); s.replace("@@L3@@", L3Status); s.replace("@@L4@@", L4Status); server.send(200, "text/html", s); } //======================================================================= // Handle Set Date/Time Settings //======================================================================= void handleForm() { String t_state = server.arg("submit"); //Change Load-1 State as per request if(t_state=="ON1") { L1Status="ON"; digitalWrite(Load1, HIGH); //Load1 Turned on } if(t_state=="OFF1") { L1Status="OFF"; digitalWrite(Load1, LOW); //Load1 Turned off } //Change Load-2 State as per request if(t_state=="ON2") { L2Status="ON"; digitalWrite(Load2, HIGH); //Load1 Turned on } if(t_state=="OFF2") { L2Status="OFF"; digitalWrite(Load2, LOW); //Load1 Turned off } //Change Load-3 State as per request if(t_state=="ON3") { L3Status="ON"; digitalWrite(Load3, HIGH); //Load1 Turned on } if(t_state=="OFF3") { L3Status="OFF"; digitalWrite(Load3, LOW); //Load1 Turned off } //Change Load-4 State as per request if(t_state=="ON4") { L4Status="ON"; digitalWrite(Load4, HIGH); //Load1 Turned on } if(t_state=="OFF4") { L4Status="OFF"; digitalWrite(Load4, LOW); //Load1 Turned off } server.sendHeader("Location", "/"); server.send(302, "text/plain", "Updated-- Press Back Button"); //This Line Keeps It on Same Page delay(500); } //======================================================================= // Power on setup //======================================================================= void setup() { delay(1000); /* You can remove the password parameter if you want the AP to be open. */ WiFi.softAP(ssid, password); IPAddress myIP = WiFi.softAPIP(); server.on("/", handleRoot); server.on("/form", handleForm); server.begin(); pinMode(Load1, OUTPUT); pinMode(Load2, OUTPUT); pinMode(Load3, OUTPUT); pinMode(Load4, OUTPUT); } //======================================================================= // Main Program Loop //======================================================================= void loop() { server.handleClient(); } //======================================================================= |
Circuit Connections with Electrical Appliances and Power supply.
You can connect 12V 1Amp Power supply in any direction.(reverse polarity)
WARNING: Be careful when connecting electrical appliances. risk of electrical shock.
you can test circuit without connecting electrical appliances.
Testing of Circuit
- Turn on circuit with 12V 1Amp Power supply
- Take your mobile and disconnect any WiFi or Data Connections.
- Turn on WiFi and Look for WiFi network named as “HomeServer” and connect with password: “homeautomation”
- This WiFi Network is created by your IoT Home automation project.
- Open Web browser and Enter IP: 192.168.4.1 Make sure your data connection is disabled.
- You will find below screen and start operating it.
Reviews
There are no reviews yet.